
This MOVEit Top Tip describes how to use the monitor function and create Ipswitch Analytics report templates. It’s written by our MOVEit expert Richard Auger.
Real Time View
To view the status of transfers in (near) real time, click on the monitor option at the top left of the screen.
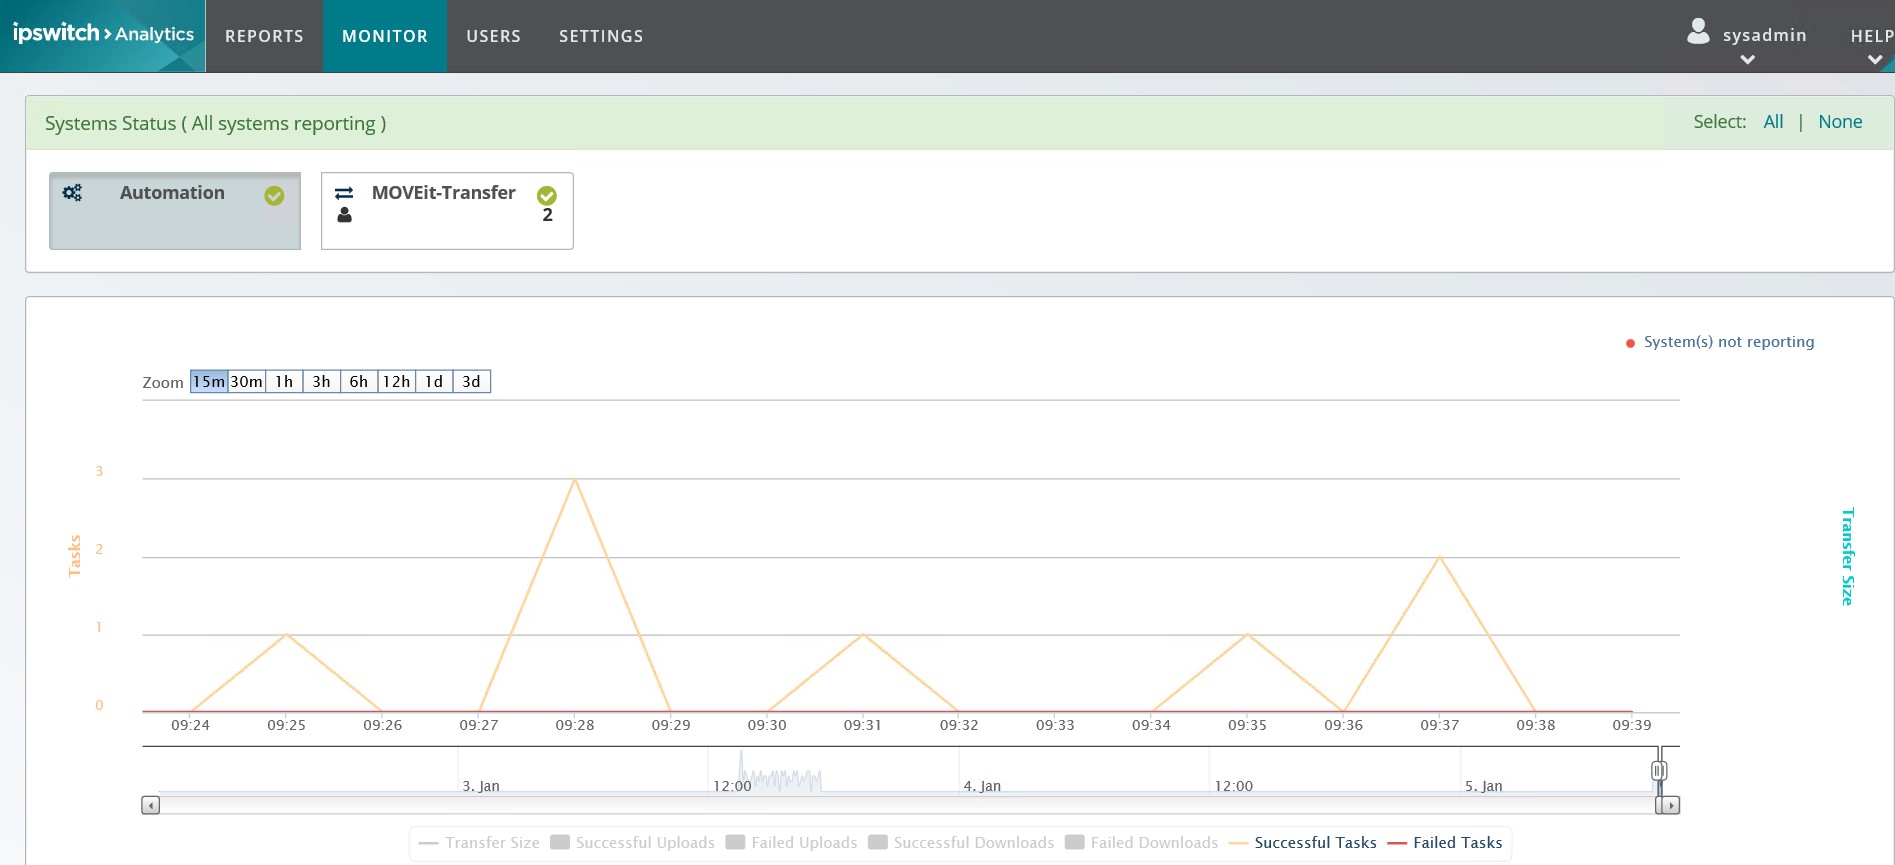
If you are using both Transfer and Automation, you may wish to show just one product at a time (as shown above). You can select which products to display simply by selecting or deselecting the agents shown at the top of the window.
Selecting all agents gives a more comprehensive view, but may become cluttered when trying to isolate specific data.
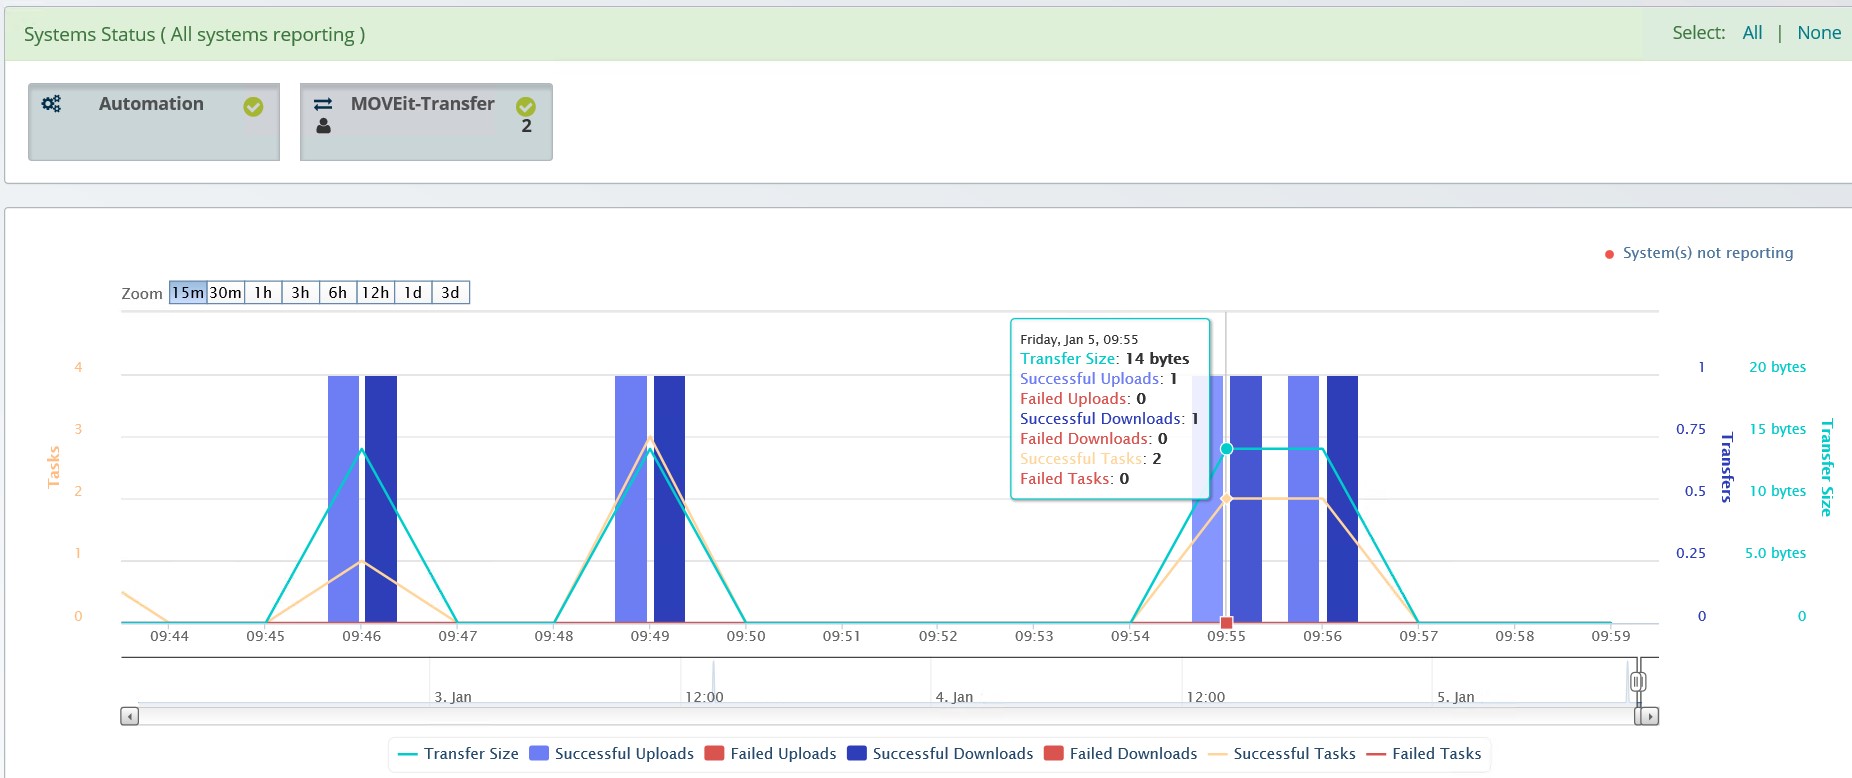
You should be aware that the monitor view does not provide true real time data; the view is derived from the Analytics database rather than the MOVEit application databases, and the Analytics database is refreshed once per minute. You cannot force a refresh of the data, nor refine the view to intervals of less than one minute.
Creating reports
By clicking on the Reports option at the top of the screen, you will be presented with three options – Report Library, Templates and Schedules.
Before going any further, it’s worth clarifying the difference between Reports and Templates. A report is the output from execution of a report, while a template is the configuration of the report itself. Although Analytics comes with a number of templates out of the box, any report you create and configure yourself is also a template (which you then run to produce the report). You do not necessarily have to save the template, however it makes sense to do so for more commonly required reports.
By default the Report Library is empty, so the first thing to do is to switch to the templates tab.
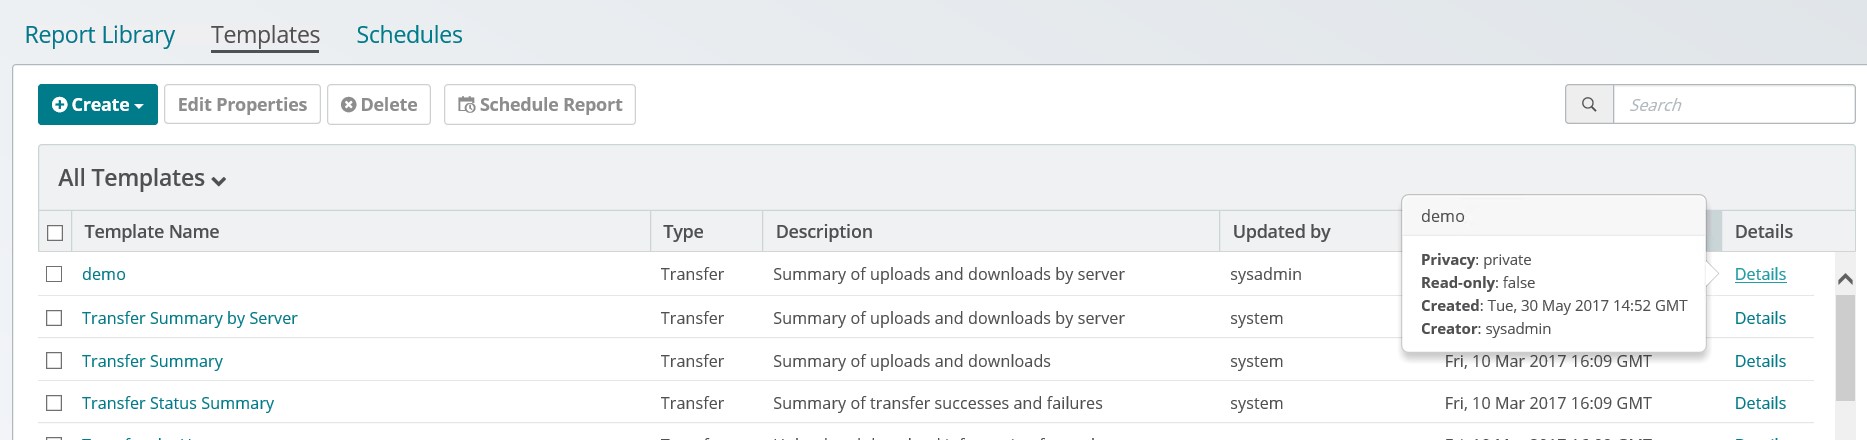
Note the content of the ‘Updated by’ column. Anything with a value of ‘system’ is a default template, which cannot be modified. You can update and save it with a different name though. This is useful as a starting point when creating a new template.
Templates fall into four categories – Transfer, Workflow, Audit and Security. While Workflow relates to MOVEit Automation, the other categories include both Transfer and Automation (plus in some cases the Analytics server itself).
Example
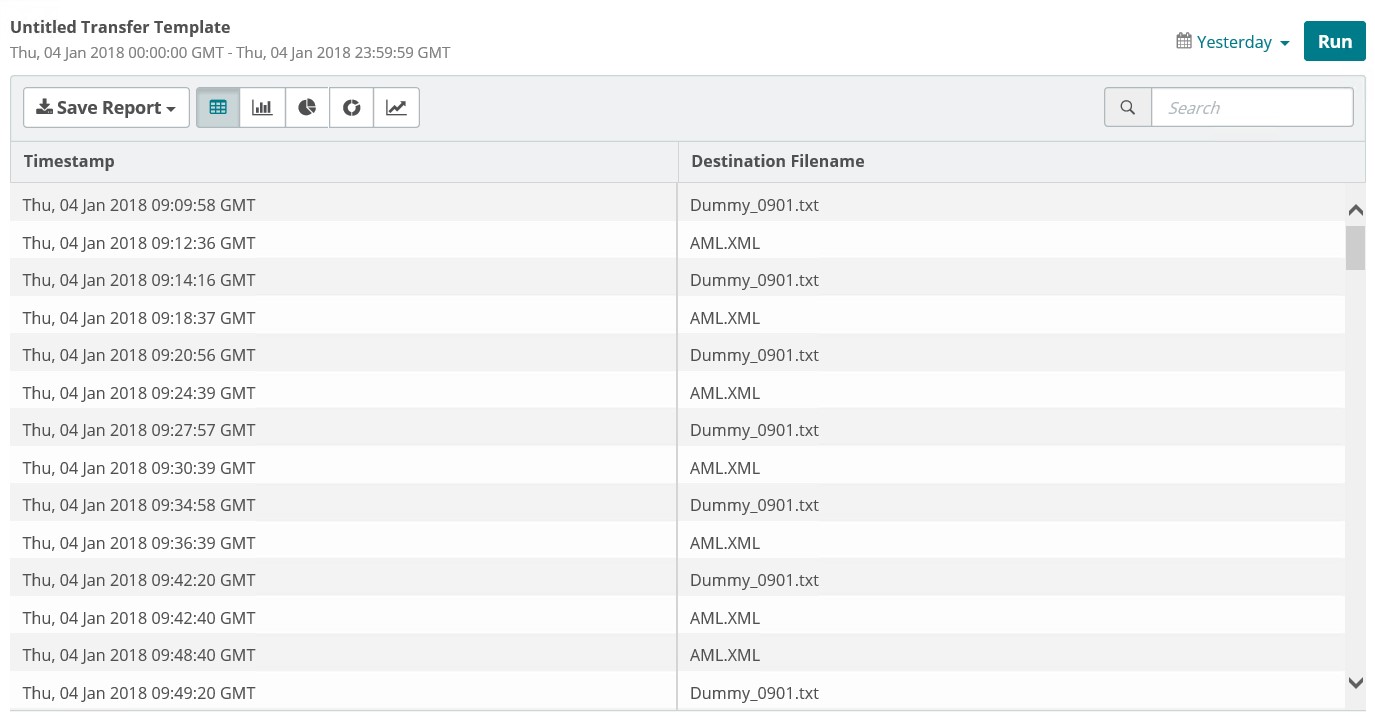
As an example, we will create a template on all MOVEit Automation file deliveries for the previous day. To do this, click on ‘Create’ and select ‘Transfer Template’. At the top right of the screen, select ‘Detailed’ as the Report Output. On the left of the screen, we have – by default – the available fields listed that we can use in the report. Expand ‘File’ and select ‘Destination Filename’. At the top right corner, click the ‘this week’ link and select ‘Yesterday’ instead, then press the ‘Run’ button. We now have a listing of all the files transferred. However, our report doesn’t look terribly attractive at this point. We will add ‘timestamp’ from the ‘Time’ group, ‘Operation’ from the ‘Operation’ group, and then press ‘Run’ again.
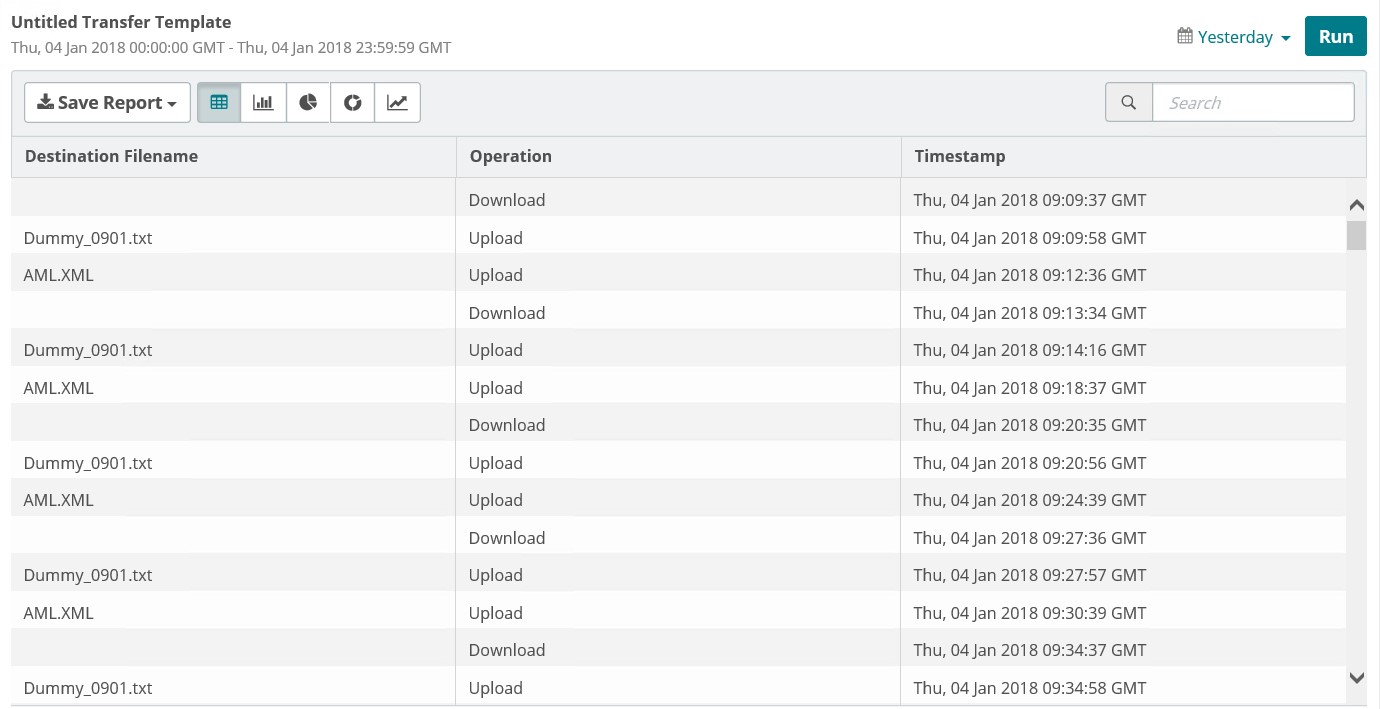
Because we are looking at the Destination filename, it makes sense to only report on the Upload steps. To do this, click on the Filters tab at the top left and then click ‘Add filter’.
Choose ‘Operation’ from the drop-down box and select ‘Upload’. We then need to restrict the report to just the Automation server. Click Add Filter again and this time choose ‘Server Subtype’. Select ‘Central’ and click ‘Add and Run’. (In Analytics, Automation is still referred to as Central and Transfer is still known as DMZ).
Finally, we can go back to the fields tab and deselect ‘Operation’ (we don’t need it in the report as everything will be an upload). To make things even tidier, deselect the Destination Filename and select it again – this will turn it into the last column:
Now that we have the report we need, it’s a simple case of clicking the ‘Save Template’ button and providing a name and description. If desired, the report template can be shared with all users at this time too.
The report can be executed at any time from the Templates library, or can be scheduled if required. Be aware that even though we specified ‘yesterday’ for the date range, by default each time the report template is accessed (or added as a new schedule), it will be set to report on the previous week.
Compare MFT solutions


Guides:

Need UK-based MOVEit support?
We are certified Progress MOVEit Titanium Partners and our team includes the UK’s leading MOVEit expert.
See our range of support and consultancy services to help you get the most out of your MOVEit solution.