
by Richard Auger | Sep 30, 2022
One feature of MOVEit Transfer that is not routinely used is Webposts; these are forms that you can set up for people to input information to be passed into MOVEit. This information is placed into a subfolder under the Webposts folders and can be accessed as xml.
There are many ways that this function can be used in an organisation, however, in this article we are going to look at using it as the basis for a file transfer approval system.
This needs us to have MOVEit Transfer and MOVEit Automation; Automation needs to have custom scripts licenced.
Moving files from a folder with access into a folder without access
The scenario that it will address is this: An end user wants to move files from a folder that he has access to into a folder that he has no access to. The steps that make up this process are as follows:
- User completes a webpost form, selecting an approver from a list and entering the folder names
- Automation downloads the xml file and reads the values inside it
- Automation creates a temporary webpost form using the values from the previous step and sends a link to the approver
- The approver approves or declines the temporary webpost form
- Automation downloads the new xml file. If the request was approved it performs the transfer; if it was declined it doesn’t. In either case, an email is sent to the requestor informing them.
Set Up
In the Transfer server, add the following folder structures with files. A basic web.config file can be added to each folder:

Two new virtual folders named ‘Approvals’ and ‘Posting’ need to be created, pointing to the relevant folders above.
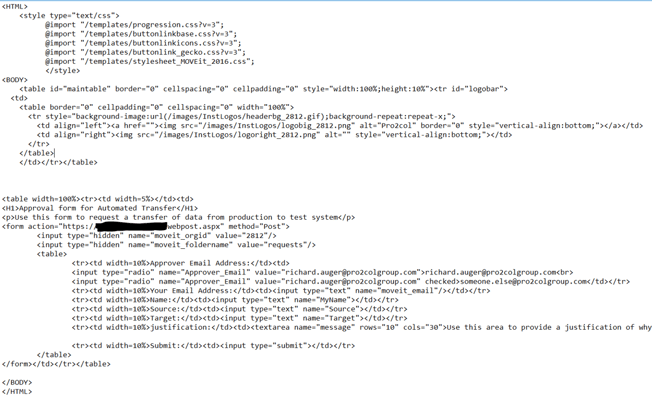
You now need to create the webpost forms. Index.html is the initial form that the end user will complete, and template.html is similar but with an approval button. Template.html has all entries prefilled with dummy values that can be easily replaced, e.g. in the source field a default value of ‘ZZZSourceZZZ’ is used. My index.html looks like this.
In the Transfer web UI, you need to create a couple of folders under the webposts folder, I named mine Approvals and Requests.
When you have finished this part, you should be able to navigate to https://<your_transfer_url>/posting and see the approval request form, looking something like this:

If you complete the form, you should get a success message:
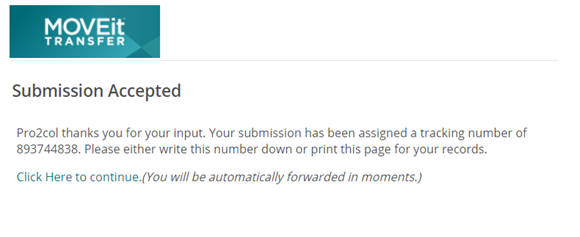
However, the xml will remain in the webposts/requests folder until the Automation setup is completed.
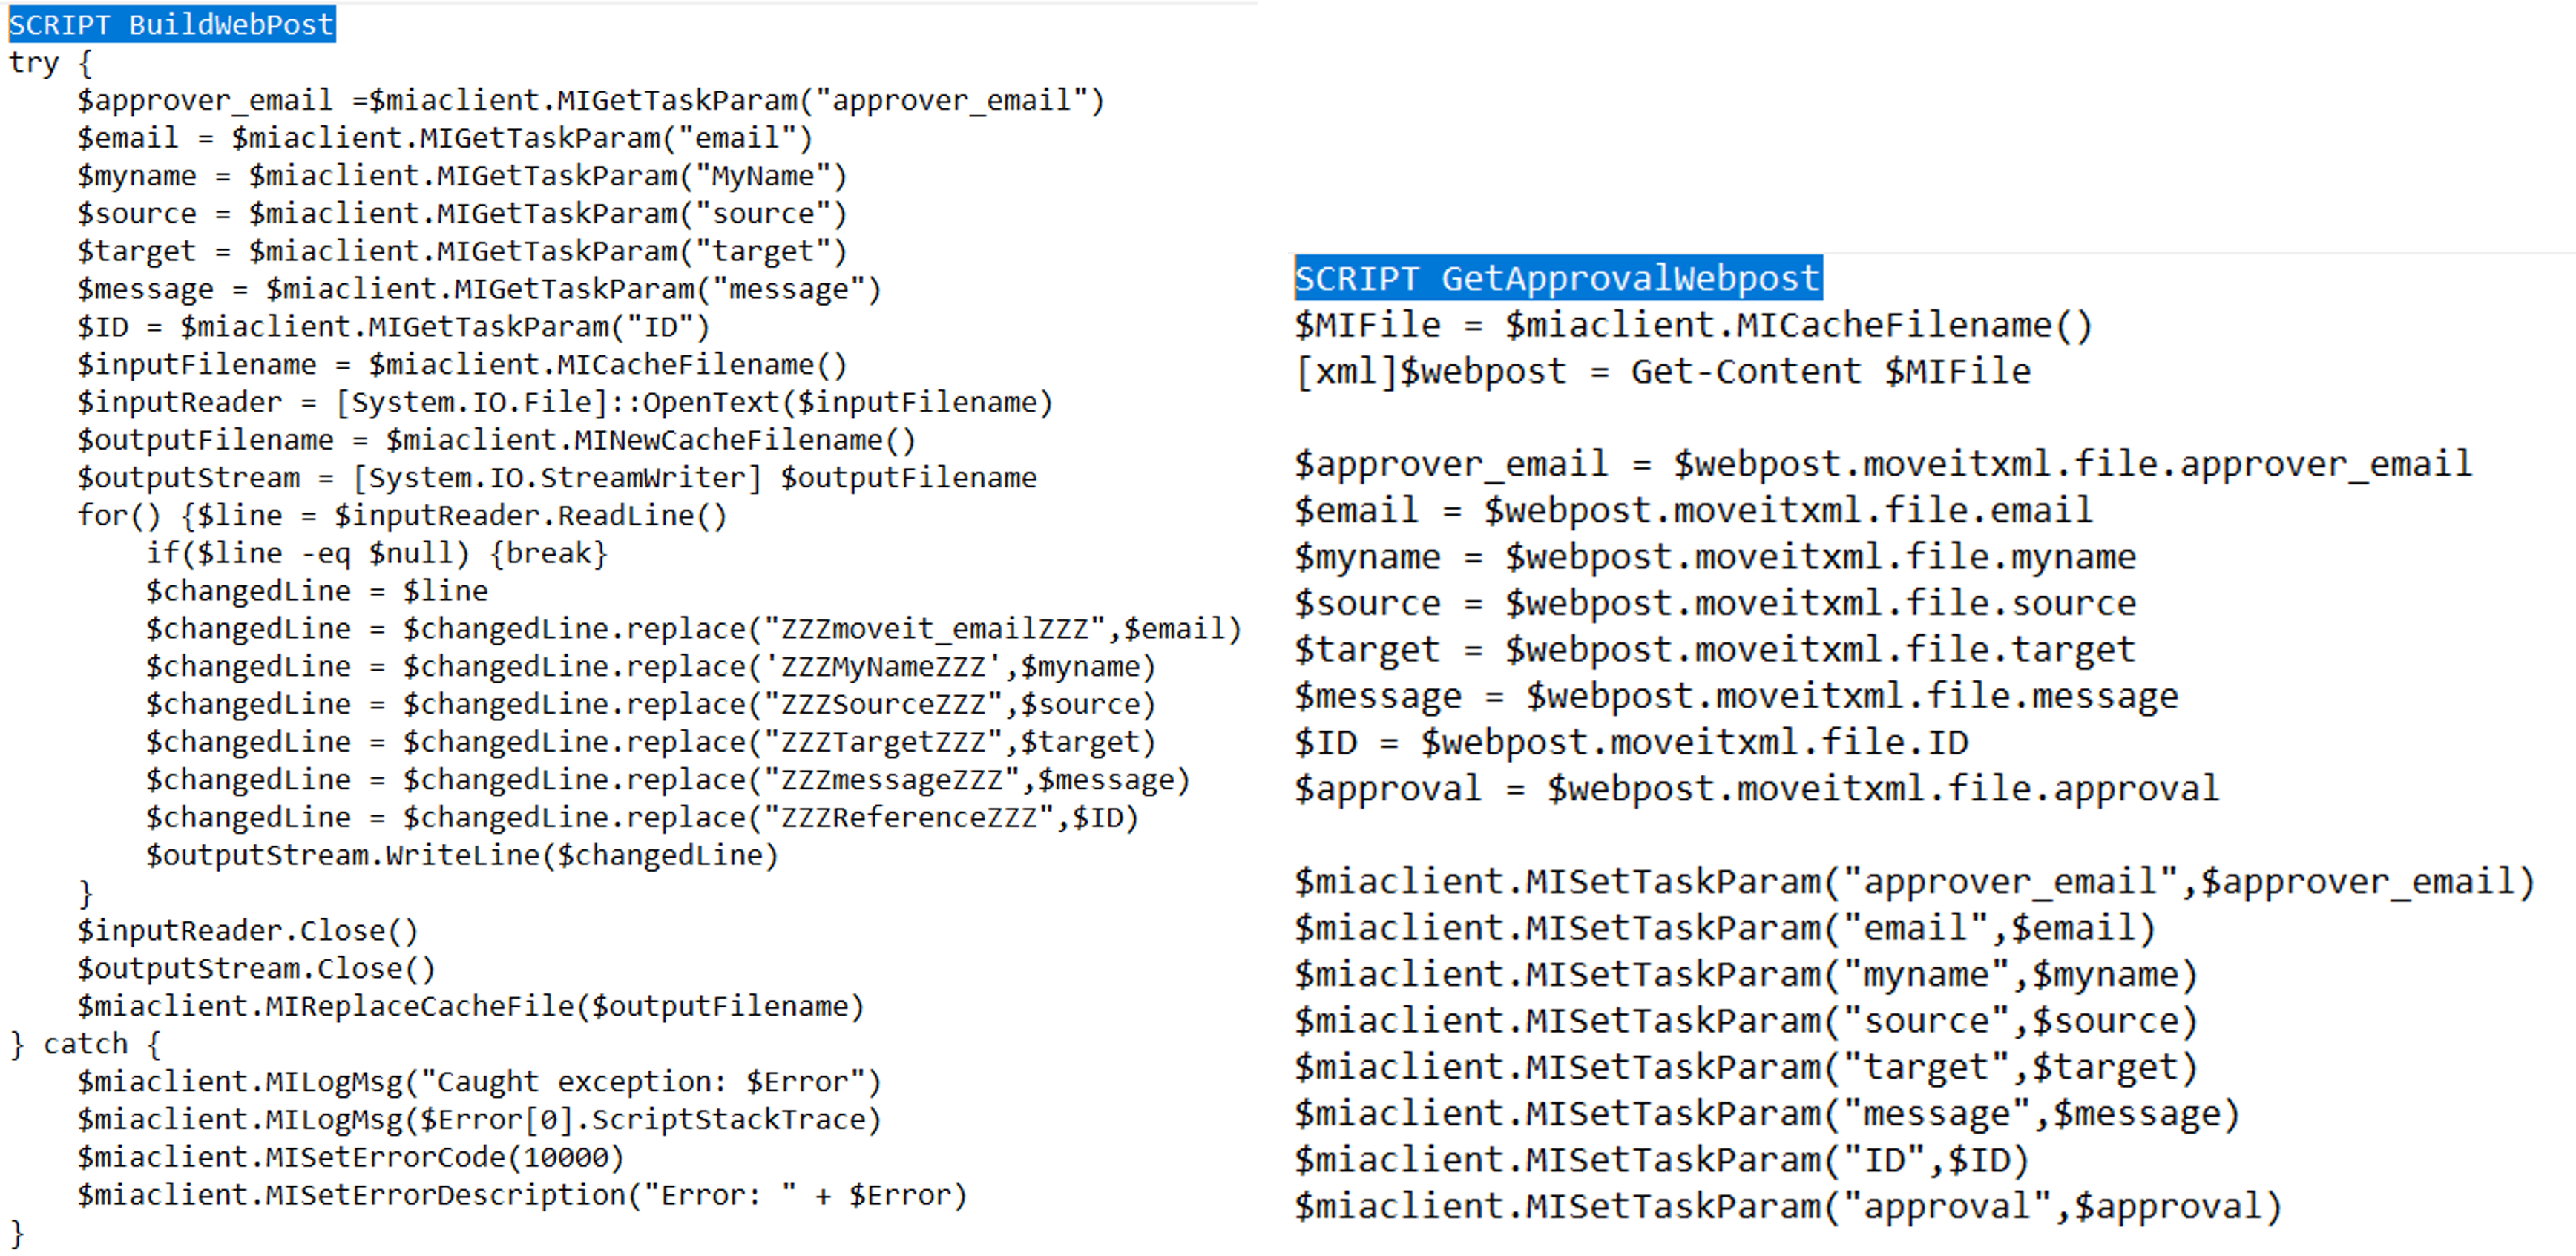
You need two custom scripts to run in the Automation tasks:
Finally, there are four tasks required to handle the process.
Approval workflow Step 1
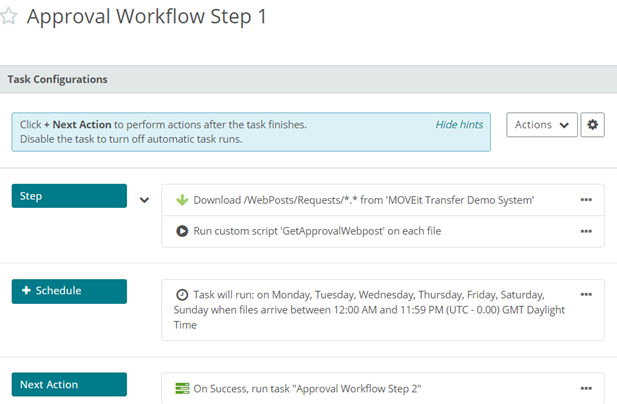
This task (step 2 in the list above) downloads the xml created when a user submits the form, and reads the content. It then passes this information to the next task in the flow as parameters:
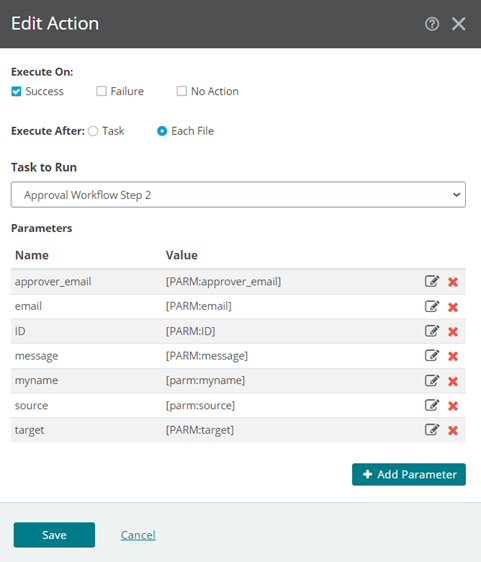
Approval Workflow Step 2
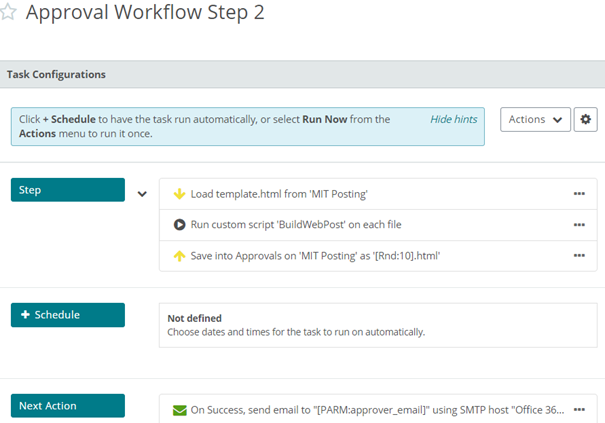
In the second task, we take a copy of the template and update it with the parameters passed from the previous task. The result is saved as a new webform template with a random name into the posting folder and the selected approver receives an email with a link to it.
Approval process Step 3
The third task is triggered by the approver completing the webpost approval form. It’s the only advanced task used:
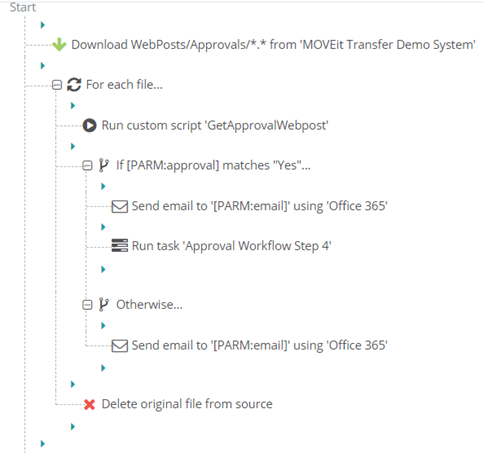
We again read the xml generated by the webpost, which this time also includes the yes/no for the approval. If this was a yes, the final task will be launched with parameters being passed to it:
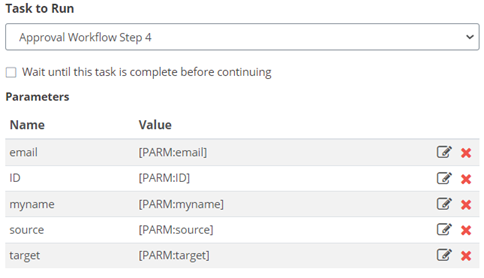
Approval Process Step 4
This is the final step of the process and literally copies the content from one directory to another.
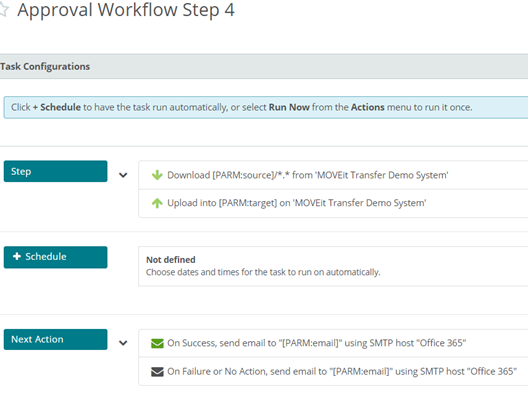
In this example, you can see that both directories are on the same server (Transfer), however, there is no reason not to put them on any other protocol (SFTP, FTP, UNC) as the situation requires.
Finally, I should mention that the webposts are anonymous. Because of this, it makes sense to host the forms on a server that is not being published to the internet, or risk being flooded with bogus forms. Alternatively, you could introduce some form of validation and discard entries that don’t meet your criteria
We'll also be able to supply you with various components in text format. Our Technical experts have years of experience in the MFT industry and work with MOVEit on a daily basis.
For more support on creating a file transfer process request in MOVEit, please get in touch with us.
Compare MFT solutions


Guides:

Need UK-based MOVEit support?
We are certified Progress MOVEit Titanium Partners and our team includes the UK’s leading MOVEit expert.
See our range of support and consultancy services to help you get the most out of your MOVEit solution.